Coffee table books are more than just books. They’re art pieces. They showcase stunning photos, artwork, or designs. Whether you’re a photographer, artist, or designer, printing a high-quality coffee table book can elevate your work. This guide explains how to print a coffee table book with exceptional visual quality. Follow these steps to create a book that stands out.
What Is a Coffee Table Book?
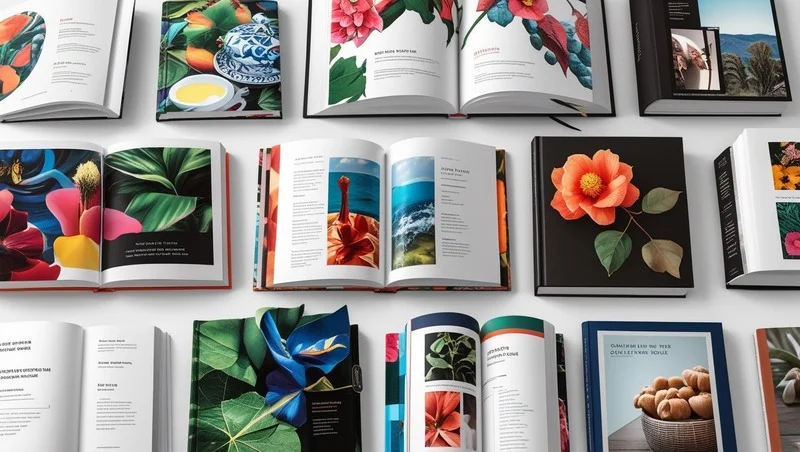
A coffee table book is a large, hardcover book filled with high-quality images. It’s designed to spark conversation and add style to a room. These books often focus on topics like art, photography, travel, or fashion. They prioritize visuals over text, making print quality crucial.
- Key features: Large format, premium paper, durable binding, and eye-catching covers.
- Purpose: To display beautiful visuals and enhance home decor.
- Common sizes: 8.5×11″, 9×12″, 10×10″, or larger (up to 12.5×16.5″).
Step 1: Plan Your Coffee Table Book

Before printing, plan your book carefully. A clear vision ensures a professional result.
- Choose a theme: Focus on a specific topic, like travel photos or art portfolios. A cohesive theme engages readers. For example, a book on Italian architecture needs consistent imagery.
- Select high-resolution images: Use images with at least 300 DPI for sharp prints. Low-resolution photos look blurry when printed.
- Decide on size and format: Common sizes include 10×10″ or 12×12″. Landscape or square formats work well for visuals.
- Plan the layout: Arrange images for a logical flow. Include minimal text, like captions or short stories, to complement the visuals.
Step 2: Choose the Right Printing Service
Selecting a reputable printer is key to stunning visual quality. Top printers like Mixam, QinPrinting, and PrintNinja specialize in coffee table books. Here’s what to look for:
- Offset printing: This method delivers sharp, vibrant images. It’s ideal for high-quality books but may require a minimum order (e.g., 100 copies).
- Customization options: Look for printers offering various sizes, bindings, and finishes.
- Customer support: Choose a printer with responsive support to guide you through the process.
- Proofing services: Order a test print to check quality before a full run.
External link suggestion: Link to Mixam’s Coffee Table Book Printing page (https://mixam.com/coffee-table-books) for examples of professional printing services.
Step 3: Select Premium Materials
The materials you choose affect the book’s look and feel. High-quality materials enhance visual appeal and durability.
- Paper types:
- Glossy paper: Boosts color vibrancy and contrast, ideal for photography books.
- Matte paper: Offers a soft, elegant look, perfect for art or minimalist designs.
- Premium options: Consider 157 gsm Matte Art or archival-quality Mohawk ProPhoto Pearl for a luxurious feel.
- Cover options:
- Hardcover: Durable and professional, often with dust jackets or image wraps.
- Special finishes: Foil stamping, embossing, or imitation leather add sophistication.
- Binding types:
- Sewn binding: Ensures durability and allows the book to lay flat.
- Perfect binding: Cost-effective but less durable for frequent use.
- Layflat binding: Ideal for panoramic spreads, eliminating the center crease.
Step 4: Prepare Your Files Correctly
Proper file preparation ensures flawless printing. Follow these guidelines:
- Use CMYK color mode: RGB colors look different when printed. Convert images to CMYK for accurate color reproduction.
- Export as PDF: Most printers, like QinPrinting, recommend high-resolution PDFs for best results.
- Include bleed: Add a 0.125-inch bleed area around images to avoid white borders.
- Check resolution: Ensure all images are 300 DPI or higher.
- Design the cover and spine: Include the front cover, back cover, and spine in a single PDF. Label it clearly (e.g., “cover.pdf”).
Step 5: Review and Proof Your Book
Proofing prevents costly mistakes. Always review your book before printing.
- Order a test print: Print one copy to check colors, alignment, and quality.
- Check the downloadable proof: Many printers, like Mixam, offer digital proofs to spot errors.
- Verify text: Ensure captions and titles are error-free and consistent in font and size.
- Inspect images: Confirm no images are blurry or misaligned.
Step 6: Add Finishing Touches
Finishing touches make your book stand out. Consider these options:
- Foil stamping: Adds metallic accents to the cover for a luxurious look.
- Embossing or debossing: Creates raised or recessed designs for texture.
- Dust jackets: Protect the book and add a decorative element.
- Headbands: Small details that enhance the spine’s appearance, as offered by WhiteWall.
Step 7: Distribute and Display Your Book
Once printed, your book is ready to shine. Here’s how to share it:
- Display at home: Place it on a coffee table or shelf to spark conversation.
- Sell online: Use platforms like Amazon or Etsy to reach a wider audience.
- Partner with stores: Work with galleries or boutiques for niche markets.
- Promote on social media: Share images of your book on Instagram to attract buyers.

Why Visual Quality Matters
High visual quality makes your coffee table book memorable. Stunning images draw readers in. Premium materials create a luxurious feel. Precise printing ensures every detail shines. A well-crafted book reflects your professionalism and creativity.
Common Mistakes to Avoid
- Using low-resolution images: Always use 300 DPI or higher.
- Ignoring proofing: Skipping a test print can lead to errors.
- Choosing cheap materials: Low-quality paper or binding reduces impact.
- Overloading text: Keep text minimal to focus on visuals.
Conclusion
Printing a coffee table book with stunning visual quality is achievable. Plan your theme, choose a reputable printer, and use premium materials. Prepare files correctly and review proofs carefully. Add finishing touches to make your book unique. With these steps, your coffee table book will impress readers and enhance any space.